Tongue and Groove Ceiling Costs: Materials, Labor, and Tips
Published November 5, 2026
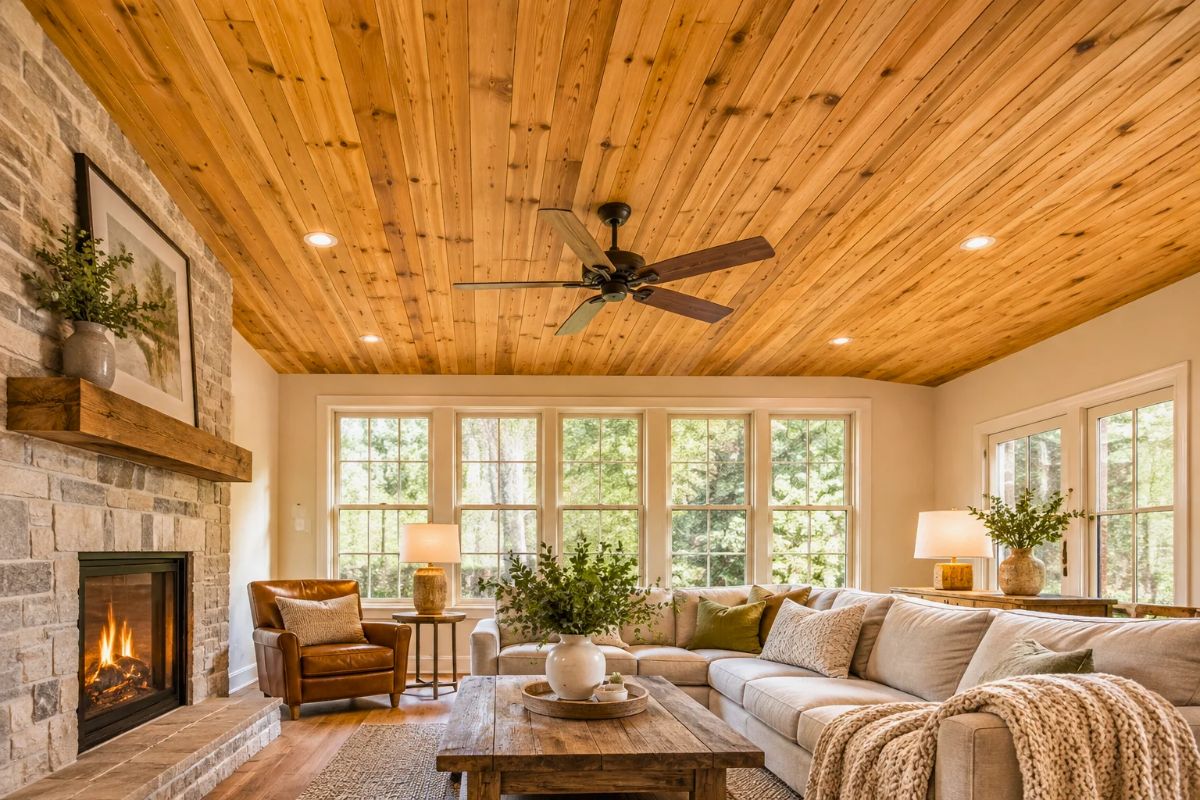
A tongue and groove ceiling adds natural wood texture and architectural character to a room. However, the total installation cost depends on more than the plank price. Wood species, board quality, ceiling dimensions, labor, and finishing requirements all affect your budget.
For a general US budget, tongue and groove ceiling materials typically cost $2 to $6 per square foot. Standard installation labor adds $2 to $4 per square foot. This brings the estimated installed cost to $4 to $10 per square foot. Specialty wood, custom milling, and complicated ceiling layouts can increase the total. Actual costs depend on your material choice, project complexity, local labor rates, and installation needs.
Understanding these expenses helps you compare materials, evaluate installation quotes, and plan your project.
What Is a Tongue and Groove Ceiling?
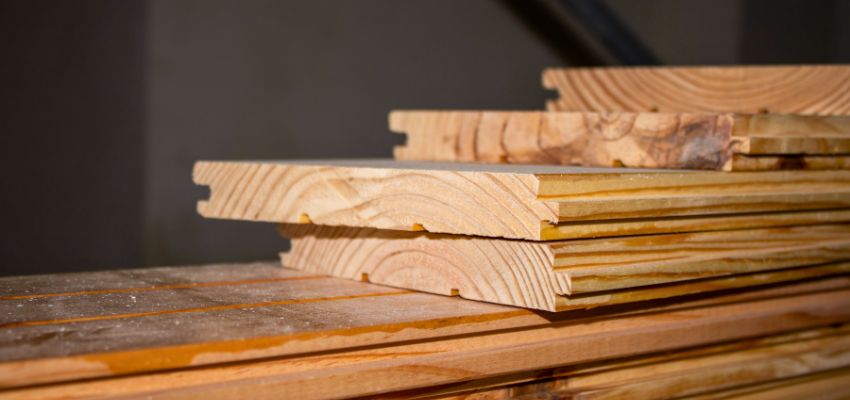
A tongue and groove ceiling consists of interlocking wood boards. Each plank has a protruding edge, called a tongue, that conforms to a corresponding groove on the next board. This creates a connected surface with consistent seams and a finished wood appearance.
This design works in many spaces. These include living rooms, bedrooms, kitchens, vaulted ceilings, covered porches, and patios. Depending on the wood products and the installation environment, you can leave the boards unfinished. You can also treat them with paint, stain, or a suitable protective coating.
Common Wood Types for Tongue and Groove Ceilings
Your choice of wood affects the ceiling’s appearance, price, and maintenance requirements.
- Knotty pine: An economical option with visible knots and warm grain patterns that suit rustic and farmhouse interiors.
- Clear pine: Has fewer visible knots and a more uniform appearance for a cleaner finish.
- Cedar: Certain cedar species have naturally durable heartwood that offers resistance to decay. Performance varies by species and wood composition.
- Cypress: Bald cypress heartwood can resist decay naturally. Durability depends on the wood’s age, characteristics, and exposure conditions.
- Reclaimed wood: Provides distinctive grain patterns and weathered textures. Pricing depends on availability, condition, inspection, and preparation requirements.
Compare the available species, grades, and board specifications to find an option that suits your design and budget.
How Much Does a Tongue and Groove Ceiling Cost?
A tongue and groove ceiling typically costs $2 to $6 per square foot for materials. Standard installation labor adds approximately $2 to $4 per square foot, bringing the estimated installed cost to $4 to $10 per square foot.
These are general US budgeting benchmarks, not fixed contractor prices. Specialty wood, premium board grades, custom profiles, and difficult ceiling configurations may exceed these ranges. Local labor rates and project conditions also affect the final price.
Material estimates usually cover only the wood planks. Labor covers measuring, cutting, fitting, and securing the boards. Contractors may charge extra for ceiling removal, structural repairs, finishing, trim, delivery, and equipment rentals.
Estimated Cost by Project Size
The following examples use the general estimates above:
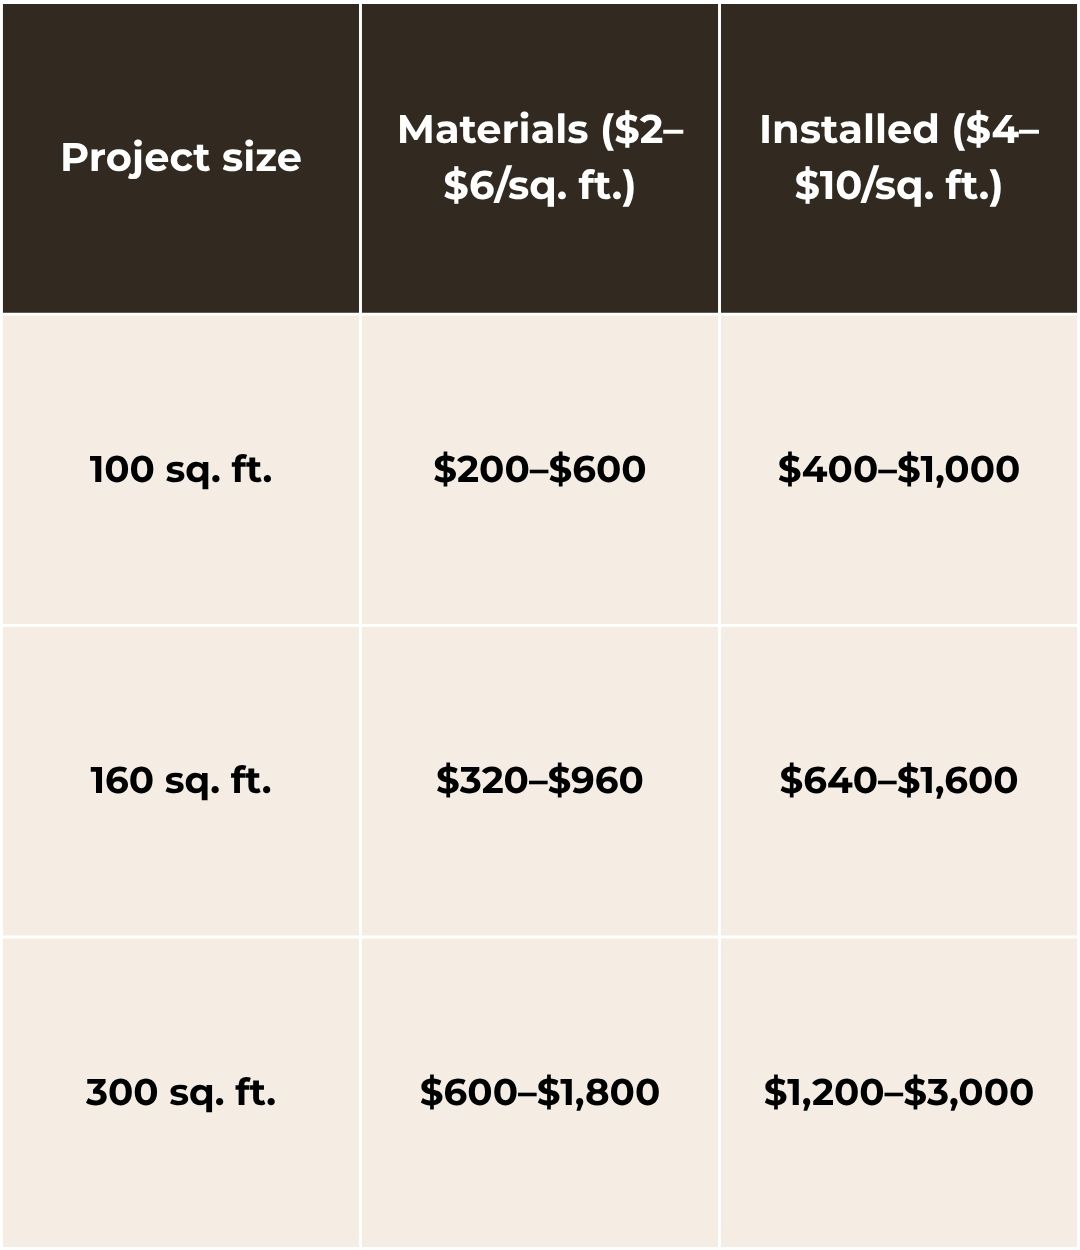
These figures do not include demolition, repairs, custom milling, premium finishes, or specialized access equipment. Request a detailed estimate based on your ceiling dimensions and selected materials.
What Factors Affect Tongue and Groove Ceiling Costs?
Two projects with the same square footage can have different prices. The following factors influence the final estimate.
Wood Species, Grade, and Quality
Common softwoods like pine are often more affordable than premium hardwoods and specialty timber. Clear-grade boards may cost more than knotty varieties because they have fewer visible imperfections.
Board width, thickness, length, and profile affect pricing, especially when custom dimensions or milling are required. Reclaimed wood may require additional inspection, cleaning, preparation, or processing before installation.
Ceiling Size, Height, and Complexity
Larger ceilings require more material and installation time. Ceiling height and layout also matter. Flat ceilings are usually easier to work on. Vaulted, sloped, or cathedral ceilings are harder and may need scaffolding or other access equipment.
Exposed beams, recessed lights, vents, corners, and uneven edges need extra measuring and cutting. These details can increase labor costs.
Finish and Protective Treatments
Unfinished boards, paint, stain, and protective coatings offer different appearances and maintenance needs. Stain highlights natural grain, while paint creates a more uniform finish.
Covered outdoor ceilings require attention to moisture exposure, ventilation, and finish suitability. Additional surface preparation, custom colors, and multiple coats can increase expenses. Follow the wood supplier’s and coating manufacturer’s recommendations.
Existing Ceiling Conditions
Installing planks over a suitable existing surface may lower demolition costs. The supporting structure must still offer adequate fastening points.
Damaged framing, uneven surfaces, or weak support may need repairs. Extra furring strips may also be required. Electrical fixtures, fans, and vents may need adjusting too. A qualified professional may be needed for this work.
How Much Does Installation Labor Cost?
Standard tongue and groove ceiling installation labor adds $2 to $4 per square foot. Actual rates vary by location, project size, accessibility, and complexity. More demanding installations may cost more.
Depending on the project and contractor’s quote, professional installation may involve:
- Measurement and layout: Measuring the ceiling and planning plank direction and placement.
- Surface preparation: Checking the ceiling structure and identifying suitable fastening points.
- Cutting and fitting: Adjusting boards to fit the ceiling, corners, and fixture openings.
- Fastening and alignment: Securing planks using the manufacturer’s recommended method.
- Trim and finishing: Completing edge details and any agreed finishing work.
The interlocking edges connect adjoining boards but do not replace the need for proper structural support. Depending on the product and installation system, you may need to secure the planks to ceiling joists, furring strips, or a compatible mounting system. Always follow the manufacturer’s installation instructions.
Check what each contractor’s estimate covers. Confirm it includes preparation, materials, finishing, trim, cleanup, and disposal.
DIY vs. Professional Installation: Which Is More Cost-Effective?
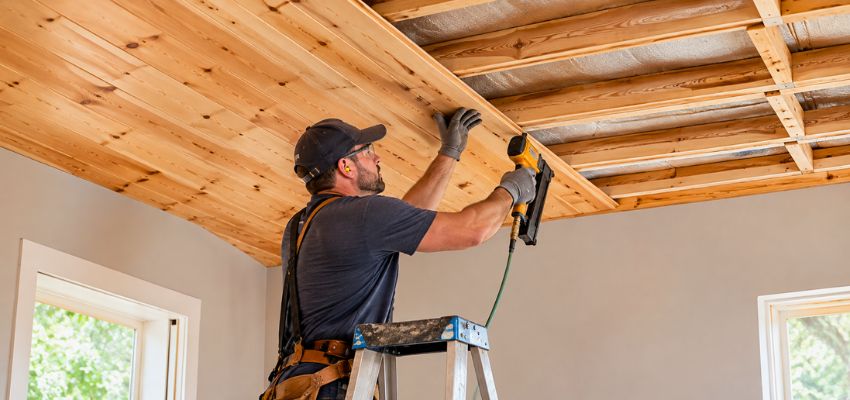
DIY installation can cut labor costs if you have woodworking experience and the right tools. Overhead work requires accurate measuring, careful cutting, secure fastening, and consistent alignment.
Include tools, fasteners, safety equipment, and finishing supplies in your budget. Use a stable ladder or work platform. Handle boards carefully. Hire a qualified professional for any electrical job.
Professional installation costs more upfront. It may be more practical for vaulted ceilings, complex layouts, large spaces, and specialty or reclaimed wood. Consider the time, equipment, and potential cost of correcting mistakes before choosing DIY.
What Additional Expenses Should You Budget For?
Materials and labor may not cover the entire project. Remember to account for these potential expenses:
- Fasteners and supplies: Nails, screws, adhesives, furring strips, and other materials required by the installation system.
- Ceiling removal and repairs: Demolition, disposal, replacement of damaged framing, and surface preparation.
- Finishing: Stains, paints, primers, protective coatings, and professional finishing labor.
- Material waste: Extra boards to account for cutting, defects, and layout requirements.
- Delivery and equipment: Transportation charges, scaffolding, and other specialized equipment.
As an initial budgeting guideline, allow 5% to 10% extra material for cutting waste. The actual amount depends on ceiling layout, board dimensions, installation pattern, and material condition. Reclaimed wood, custom-milled boards, and complex layouts may require a different allowance. Ask your supplier or installer to calculate the quantity based on the actual product and ceiling measurements.
How to Calculate Your Tongue and Groove Ceiling Budget
Use these steps to develop a preliminary project estimate.
1. Measure the Ceiling Area
For a rectangular ceiling, multiply its length by its width. For example, a room around 12 feet by 15 feet has a ceiling area of 180 square feet.
For vaulted or irregular ceilings, calculate each actual surface area separately and add the results.
2. Estimate Material Requirements
Multiply the ceiling area by the wood product’s price per square foot.
For a 180-square-foot ceiling using planks priced at $4 per square foot:
- Base material cost: 180 × $4 = $720
- With a 10% waste allowance: 180 × 1.10 = 198 square feet
- Adjusted material cost: 198 × $4 = $792
Check the product’s coverage specifications before ordering. Some suppliers sell boards individually, by bundle, or in packages.
3. Add Labor and Other Expenses
If standard installation labor costs $3 per square foot:
- Labor: 180 × $3 = $540
- Estimated materials and labor: $792 + $540 = $1,332
This subtotal excludes demolition, repairs, delivery, specialty finishing, and equipment rentals. Add applicable charges to estimate the full project cost.
4. Compare Contractor Quotes
Request estimates from multiple qualified installers. Compare the wood species, board dimensions, grade, finish, installation method, and services included.
Ask whether the quote covers materials, labor, preparation, trim, finishing, cleanup, and delivery. Confirm how additional repairs or unexpected work will be priced.
How to Save Money on a Tongue and Groove Ceiling
A few practical decisions can help control costs without compromising the finished appearance.
- Compare wood options: Knotty pine may provide a natural wood appearance at a lower price than some premium specialty products. Check board grades and specifications before choosing.
- Reduce cutting waste: Measure carefully and plan a simple plank layout to limit extra cuts and material waste.
- Avoid unnecessary custom details: Complex patterns, custom profiles, and heavy trim raise milling and installation costs.
- Compare supplier quotes: Consider usable coverage, prep, finish, and delivery fees. Don’t compare price per square foot alone.
- Choose DIY selectively: A small, flat ceiling may be manageable if you have experience and equipment. Consider professional installation for more complicated projects.
Frequently Asked Questions
Is a tongue and groove ceiling more expensive than drywall?
Generally, yes. Wood planks usually cost more than standard drywall and may require extra installation and finishing work. Drywall is often more economical, while tongue and groove offers natural wood grain and a decorative plank appearance.
How long does it take to install a tongue and groove ceiling?
The installation period depends on ceiling size, layout, wood preparation, and working conditions. A small, simple ceiling usually takes less time than a large vaulted one with many cuts and fixture openings. Some manufacturers require wood to acclimate first. Finishing and repairs can also add time.
Can you install a tongue and groove ceiling over an existing ceiling?
Yes, as long as the existing surface and supporting structure suit the installation system. Fasten the boards following the manufacturer’s instructions. Use adequate support, such as ceiling joists or properly installed furring strips. Have the ceiling inspected before installation.
Does a tongue and groove ceiling need to be sealed?
Not necessarily. Some interior ceilings can remain unfinished, while others benefit from stain or a protective coating. Covered outdoor ceilings need more attention to moisture exposure and finish suitability. Follow the supplier’s recommendations for the selected wood.
Is reclaimed wood more expensive for ceiling installations?
It can be, depending on species, availability, condition, and preparation required. Inspection, cleaning, and custom milling may add to the cost. Request a product-specific estimate that identifies usable quantities and preparation included in the price.
Can you stain or paint a tongue and groove ceiling?
Yes. Boards can be stained, painted, or left undone, depending on the wood and intended appearance. Test the selected finish on a sample first, and follow the manufacturer’s instructions for application and installation.
How do you maintain a wood tongue and groove ceiling?
Remove dust regularly and inspect boards for moisture or finish damage. Address leaks and persistent condensation promptly. If the finish deteriorates, follow the coating manufacturer’s instructions for cleaning and refinishing.

Plan Your Tongue and Groove Ceiling Project With the Right Wood
The cost of a tongue and groove ceiling depends on material selection, ceiling dimensions, installation requirements, and finishing work. Comparing wood options and requesting detailed contractor estimates can help you establish a realistic budget.
Explore the ceiling and wall planking options from Vintage & Specialty Wood to compare available materials for your project. You can also browse its reclaimed and specialty wood offerings and discuss your material requirements with the team.
Hire The Timber Experts For Your Next Project
Vintage & Specialty Wood should be your source of the highest quality timbers from around the world. When it comes to fabricating and installing reclaimed wood or specialty wood products in your home, we don’t cut corners. We offer many reclaimed wood and specialty wood products such as Douglas Fir, white oak, and much more. We also offer timber framing and wood flooring services as well. Contact our team today to speak to a timber expert about what Vintage & Specialty Wood can do for you.

This Blog Is Fact Checked
This content has undergone meticulous fact-checking by our team of internal experts. Gain a deeper understanding of the high editorial standards we uphold on our website here.

About The Author
Hi, I’m Corinne Grace, a nursing graduate from Riverside College who enjoys writing about woodworking. Read as I cover how to choose between hardwoods and softwoods, how stains and finishes perform on different species, and so much more. My goal is to give woodworkers clear, well-researched guides they can use for their next project.