How to Make Vintage Wood Crates Look Chic

Published May 9, 2024
Do you have old wooden crates collecting dust in your basement? With these easy hacks, you can give them new life.
Vintage wood crates are all the rage in the DIY scene right now. And why not? They’re cheap, versatile, and can transform a room dramatically. You can turn them into rustic furniture, storage containers, and whatever you can think of. All you need is a little bit of perseverance and a whole lot of creativity.
But how do you transform an old, dusty (and possibly moldy) wooden crate into a rustic-chic masterpiece?
First, you must ensure they’re clean and protected from further damage.
How to Clean Vintage Wood Crates
If they’ve been in storage for a long time, they’ve probably collected a fine layer of dust. To clean vintage wood crates, you’ll need a few simple tools and follow these steps:
Tools:
- Damp cloth
- Paintbrush
- Water
- Vinegar
Steps:
- Begin by gently wiping away the accumulated dust layer on the crate with a damp cloth. Ensure you cover all surfaces, including the gaps in the wood, using a paintbrush if necessary to reach into crevices.
- If your vintage crate has a musty odor, mix water and vinegar. Thoroughly wipe the inside and outside of the crate with this solution. This will help eliminate any unpleasant smells and sanitize the wood.
- Avoid over-wetting the wood during the cleaning process. Excessive moisture can lead to potential issues, so aim to dampen the cloth rather than soak it.
- After cleaning, allow the crate to air dry completely before adding treatment or storage. Ensuring the wood is dry helps maintain its condition and prevents any damage from excess moisture.
Treating the Crates
After you’ve finished cleaning the crate and it’s completely dried, it’s time to treat the crates. This process protects the wood from further damage and lasts for years.
Step 1: Sanding
To treat vintage wood crates, start by sanding. You’ll need specific tools and follow these steps:
Tools:
- Sandpaper
- Woodblock or sanding sponge
- Bristle paintbrush
- Electric sanding tool (optional)
How To:
- Start by ensuring the wood surface is smooth before applying any treatment. Vintage crates may have varnishes or rough patches that need to be addressed. Sanding helps remove these imperfections, including splinters and rough edges.
- There are two methods for sanding wood crates: manual sanding or using an electric sanding tool. If you opt for manual sanding, purchase sandpaper from a local hardware store, wrap it around a woodblock or sanding sponge, and sand the wood surface by hand. Afterward, remove debris and sand dust using a bristle paintbrush.
- Manual sanding can be physically demanding, especially when working on multiple crates. In such cases, an electric sanding tool would provide a more efficient way to sand the wood effectively.
Step 2: Staining
Vintage wood crates, particularly those that haven’t been used for a long time, tend to lose their natural color. Staining them restores their color while maintaining a natural, aged wood finish.
You can also opt for darker wood stains to give them a more weather-beaten vibe.
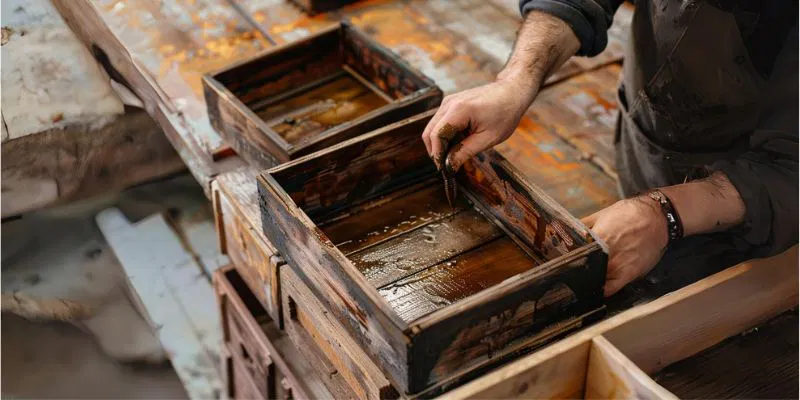
Wood stains in various shades can be purchased from online stores and your local Home Depot. For the second step of treating vintage wood crates, which involves staining, you’ll need specific tools and follow these steps:
Tools:
- Wood stain in the desired shade
- Staining brush or paintbrush
- Cloth for wiping off excess stain
Steps:
- Vintage wood crates, mainly those unused for a prolonged period, often lose their natural color. Staining them helps restore their original hues and enhances the aged wood’s appearance. Darker wood stains can give the crates a more weathered and rustic look.
- Wood stains in various shades can be purchased from online stores or local home improvement retailers like Home Depot. Using a staining brush or a regular paintbrush, apply a generous amount of wood stain to the crate’s surface.
- Apply the stain evenly across all areas to ensure thorough coverage. After application, wipe off any excess stain not absorbed by the wood using a clean cloth. This step helps prevent uneven coloring and blotching.
- Allow the stained wood crate to dry completely. This drying period is crucial to ensure the stain sets appropriately and the wood absorbs the color effectively, resulting in a beautifully restored and enhanced vintage look.
Step 3: Waxing
When the stain has dried, you can apply wood wax. Wax protects the wood and brings out the color of the stain. For this third step of treating vintage wood crates, you’ll need specific tools and follow these steps:
Tools:
- Wood wax (matte finish recommended for a natural look)
- Old rag or applicator
Steps:
- Once the wood stain has dried completely, you can apply wood wax to enhance its protection and color. Opt for a matte finish wax if you desire a natural and rustic appearance for your vintage wood crates.
- Wood wax safeguards the wood and accentuates the stain’s color, adding depth and richness to the wood’s appearance. The application process is straightforward and can even be done using an old rag as an applicator.
- Apply two to three thin coats of wood wax to the crate’s surface, ensuring even coverage. Allow each coating to dry for about an hour before applying the next one. This waiting period between coatings is essential to achieve optimal results and ensure the wax sets effectively.
- By following these steps and using the appropriate tools, you can effectively wax vintage wood crates to protect the wood, bring out the beauty of the stain, and achieve a charming, rustic look that enhances the crates’ overall appeal.
Vintage Wood Crates Upcycling Ideas
Now, you have a cleaned and well-treated vintage wood crate. What to do next? Here are some brilliant upcycling ideas you can try:

Rustic Wood Crates Bookshelf
If you have several crates, you can turn them into a rustic bookshelf. Pile them up horizontally, vertically, or any other way you like. You can hang them on your wall or put them on your floor.
Design Inspirations:
Barn Wood Wine Shelf
A vintage wooden wine shelf will perfectly complement your vintage liquor collection. You can make a cabinet-type wine shelf or a wall-attached wine rack.
Design Inspirations:
Vintage Spice and Condiments Rack
Give your kitchen a rustic makeover with a spice rack of repurposed vintage crates. Old wooden cola crates would be perfect for this project, but any old wooden crates will do.
Design Inspirations:
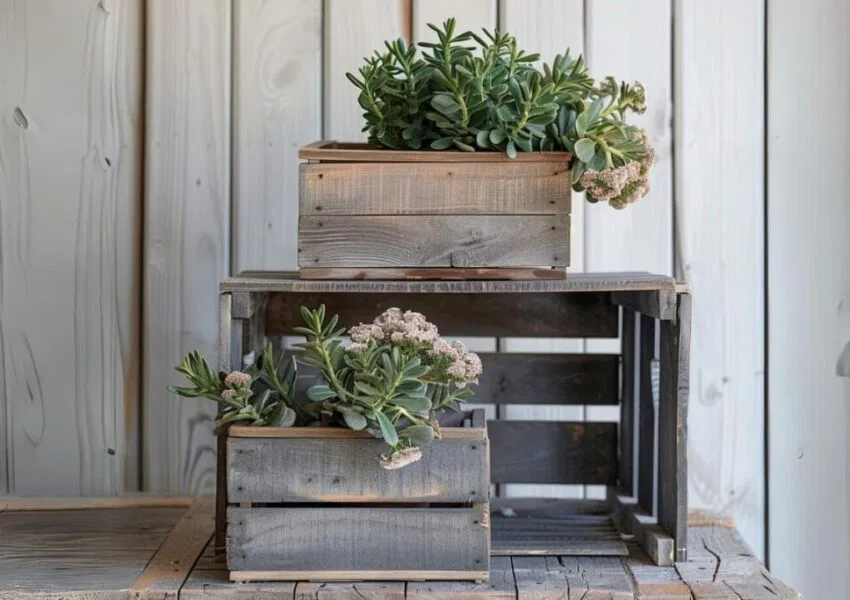
Wood Crates Plants and Succulents Box
Are you looking to start an indoor plant collection? You can save hundreds of dollars on ceramic plant pots by repurposing old crates into plant boxes.
Design Inspirations:
Hire The Timber Experts For Your Next Project
Vintage & Specialty Wood should be your source of the highest quality timbers from around the world. When it comes to fabricating and installing reclaimed wood or specialty wood products in your home, we don’t cut corners. We offer many reclaimed wood and specialty wood products such as Douglas Fir, white oak, and much more. We also offer timber framing and wood flooring services as well. Contact our team today to speak to a timber expert about what Vintage & Specialty Wood can do for you.

This Blog Is Fact Checked
This content has undergone meticulous fact-checking by our team of internal experts. Gain a deeper understanding of the high editorial standards we uphold on our website here.

About The Author
Experience, exploration, and knowledge are the hallmarks of writer Rei Bayucca. Her dedication to crafting articles that both inspire and educate will leave you thinking long after you’ve finished reading.


