Refinishing Furniture: A Beginner’s Step-By-Step Guide
Published June 16, 2025
Are you tired of outdated or worn-out furniture cluttering your space? Refinishing furniture is the perfect way to transform those pieces into something fresh and unique. The process gives old pieces new life. It’s ideal for reviving heirlooms, upgrading secondhand finds, or reducing waste. Create beautiful, fresh pieces with ease. Why settle for the ordinary when you can create something extraordinary?
In this article, we’ll walk you through the process of refinishing furniture. Learn step-by-step instructions, helpful tips, and must-have tools. Transform old pieces into treasures you’ll love to show off.
Why Choose To Refinish Furniture Instead Of Replacing It?
Refinishing furniture offers more than just a fresh appearance—it’s a smart and meaningful choice for your next project. Here’s why it stands out.
- Eco-friendly and budget-conscious. Buying new furniture fuels mass production and contributes to increased waste. Refinishing gives old pieces a second life, reducing the need for new materials. It’s more sustainable and cost-effective.
- Preserving history and character. Family heirlooms and vintage furniture possess a charm that mass-produced items can’t match. Refinishing allows you to preserve these memories while updating the piece to suit your style.
Refinish, Restore, Or Refurbish: What’s The Difference?
In DIY furniture projects, terms like refinish, restore, and refurbish are often mixed up, but they have distinct meanings. Understanding the differences helps you choose the proper method for your project and skill level.
Refinishing
Refinishing involves removing the old finish, such as paint, stain, or varnish, and applying a new one. This process typically includes sanding, staining or painting, and sealing. It’s the perfect choice for pieces with worn or damaged finishes but sturdy construction.
Best for: Revitalizing a piece’s appearance while preserving its original structure.
Restoring
Restoration focuses on bringing a piece back to its original condition. It uses materials and techniques from the same period. Unlike refinishing, it aims to preserve the original finish and craftsmanship. The goal is to maintain authenticity as much as possible.
Best for: Antique or heirloom pieces where maintaining historical integrity is key.
Refurbishing
Refurbishing involves cosmetic and functional upgrades. This can include replacing hardware, adding new legs, or reupholstering the piece. Unlike refinishing, it usually doesn’t involve stripping or altering the original wood surface.
Best for: Refreshing old furniture with a modern or updated look without a complete overhaul.
Tools And Materials You’ll Need For Refinishing Projects
Starting a refinishing project? Preparation is key when learning how to refinish furniture. Having the right tools and materials on hand can save you time, effort, and frustration along the way.
Must-Have Supplies For Stripping, Sanding, And Finishing
To kick off your project, be sure to gather these essential items:
- Sandpaper: Stock up on various grits, from coarse to fine, for different sanding stages.
- Paintbrushes or sprayer: Ensure smooth and even applications of paint or finish.
- Basic tools: Screwdrivers, pliers, and a putty knife for disassembling furniture and minor repairs.
- Wood filler: Perfect for repairing scratches, holes, or other imperfections.
- Tack cloth or clean rags: Use these to get rid of dust and debris before applying any finish.
- Protective topcoat: Choose from polyurethane, lacquer, or wax to seal and protect your project.
Optional Tools For Easier Refinishing
For larger or more detailed projects, these tools make the process faster and more efficient:
- Random orbital sander: Speeds up sanding and delivers a smooth finish.
- Heat gun: Ideal for loosening tough, stubborn finishes.
- Chemical paint stripper: Useful for intricate designs and hard-to-reach areas.
- Drop cloths: Protect your workspace from spills and messes.
- Safety gear: Gloves, goggles, and a respirator are essential for working safely with tools and chemicals.
Not every project needs advanced equipment. As you improve, quality tools can be a valuable asset. They make refinishing smoother, faster, and more rewarding.
Step-By-Step Guide To Refinishing Wood Furniture
Learn how to refinish wood furniture with this detailed, step-by-step guide. From preparation to finishing touches, follow these instructions for consistently professional-quality results.
Step 1: Assess The Furniture’s Condition
Begin by carefully inspecting the piece for any damage, scratches, cracks, or areas where the veneer might be peeling. Take note of these issues, as they can affect how you proceed with refinishing.
Next, identify the type of wood the furniture is made from and examine its current finish. Solid wood is easier to work with and more forgiving. A veneer is more delicate and can be damaged during sanding or stripping. If the veneer is thin or weak, handle it carefully to prevent further damage.
Knowing the furniture’s condition helps you plan better. It also enables you to avoid mistakes during the refinishing process.
Step 2: Clean And Prep The Surface
Start by thoroughly wiping down the furniture to remove any oils, grime, dust, or wax that may have built up over time. Use a moist cloth with mild soap or a dedicated wood cleaner to ensure the surface is spotless.
Pay special attention to corners, crevices, and any textured areas where dirt is likely to accumulate. Once cleaned, let the surface dry completely before proceeding to the next phase to ensure proper adhesion of finishes or treatments.
Step 3: Strip The Old Finish
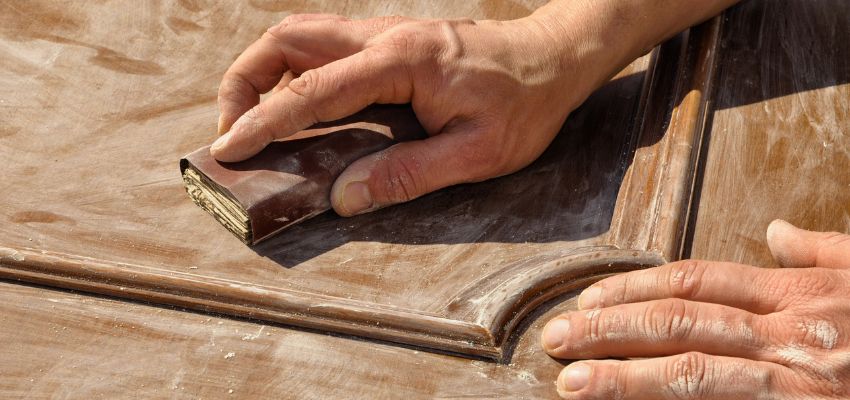
Stripping the old finish is vital in preparing your surface for refinishing. The proper method depends on the type of project, the surface, and your comfort level with the tools. Here are three standard methods to consider:
- Sanding: This method is most effective for flat, even surfaces, such as tabletops or wooden floors. Begin with coarse grit sandpaper to remove old finishes quickly. Gradually switch to finer grits for a smooth, even surface. Sanding removes old finishes and levels out scratches or imperfections. For bigger projects, use an electric sander to save time and effort.
- Chemical strippers: Chemical strippers are effective for stripping detailed furniture with carvings or decorative elements. They soften paint or varnish, making it easy to scrape off without damage. Choose eco-friendly options, such as citrus-based strippers, to reduce fumes. Always wear gloves and use them in a well-ventilated space for safety.
- Heat guns: Heat guns are a good choice for removing thick or stubborn finishes that are difficult to strip using other methods. They work by heating the old finish until it softens, allowing you to scrape it off with ease. However, heat guns require careful handling to minimize the chances of burns or accidentally scorching the surface. Use them on heat-resistant materials and keep a steady hand to ensure even heating.
Regardless of the method you choose, clean the surface thoroughly after stripping. This removes residue and prepares it for the next step.
Step 4: Sand Smooth And Repair Damage
After removing the finish, thoroughly sand the entire piece. Always sand along the direction of the wood grain to avoid creating scratches. Start with medium-grit sandpaper. Then, move to finer grits (180-220) for a smooth surface ready for staining or painting.
Inspect the surface closely for any imperfections such as holes, scratches, or dents. Evenly fill these areas with quality wood filler and let it dry completely. Once dry, sand the repaired areas again to ensure a seamless, even surface that blends perfectly with the rest of the wood.
Step 5: Apply The New Stain Or Paint
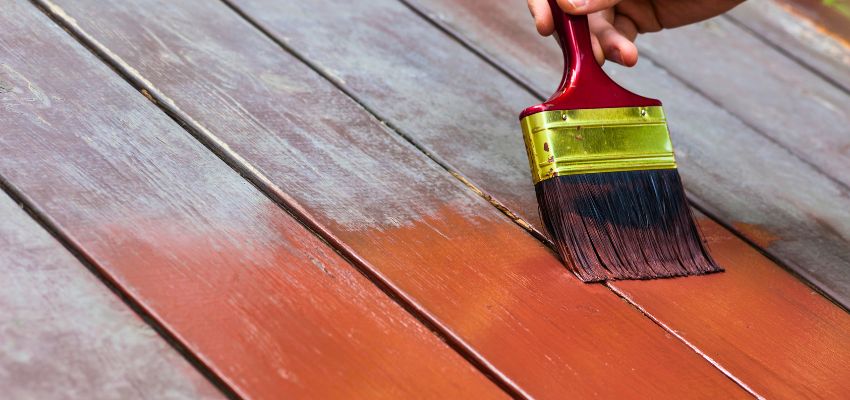
Now it’s time to give your wood a fresh new look! First, choose between staining, painting, or a creative option. Try paint washing—a trendy technique that uses a diluted color wash to highlight the natural wood grain for a unique look.
For painting:
- Begin by applying a primer designed specifically for wood surfaces to enhance adhesion and durability.
- Once the primer is fully dry, apply thin, even coats of paint using a good-quality brush or roller to avoid streaks, bubbles, or drips.
- Let each layer fully dry before applying the next coat to achieve a smooth, polished finish. This step is key for durability and a professional look.
For staining:
- Always test the color on a small, inconspicuous area first to ensure it’s precisely what you want. Stains can sometimes look different depending on the type of wood.
- Apply the stain using a clean, lint-free cloth or a staining pad, working in the direction of the wood grain to ensure the most natural and even coverage.
- Don’t forget to wipe away any excess stain immediately after application to avoid uneven spots or blotches. This gives the wood a more uniform and polished appearance.
- For a deeper, richer color, consider adding a second coat of stain once the first layer is fully dry.
No matter your choice, take your time and follow these steps carefully to ensure your wood project looks its best.
Step 6: Seal With A Protective Topcoat
After all your hard work, it’s time to protect your piece with a topcoat. The proper sealant not only safeguards your project from deterioration but also improves its appearance. Here’s how to choose the right one based on your desired finish:
- Polyurethane: Ideal for high-traffic areas, this finish protects against scratches and stains. Choose from oil-based or water-based options. Available in matte, satin, or glossy sheens to match your style.
- Wax: Ideal for creating a soft, matte finish that adds a touch of rustic or vintage change. While it’s not as durable as other finishes, wax works well for decorative pieces or items with lighter use. Reapply periodically to maintain its effect.
- Shellac or lacquer: These options help you achieve a smooth, polished, professional look. They dry quickly and add richness to your piece. However, careful application is needed to avoid streaks or uneven layers.
Apply your selected sealant in thin, even layers using a brush, sprayer, or roller. Allow each layer to dry completely, and lightly sand between coats if the instructions recommend it. This ensures a flawless, long-lasting finish that will keep your project looking great for years to come.
How To Achieve A Flawless, Professional Finish
Follow these expert tips to ensure your furniture looks impeccable:
- Work in a Clean, Dust-Free Space: Dust particles can ruin wet paint or stain. Protect your workspace and wear lint-free clothing to keep everything pristine.
- Test in an Inconspicuous Spot First: Test paints or stains on a hidden spot first. Make sure you like the finish before doing the whole piece.
- Use Thin, Even Coats: Apply with long, smooth strokes to avoid unsightly drips and brush marks, creating a polished, uniform look.
Frequently Asked Questions
What’s the easiest way to refinish furniture?
For beginners, painting is often the simplest option compared to staining. Start by practicing on flat, sturdy pieces to build confidence.
Can I refinish furniture without sanding?
Yes, it’s possible to skip sanding by using chemical strippers or liquid deglossers. However, light sanding is still recommended to ensure smooth, even surfaces.
How long does it take to refinish wood furniture?
The timeline will depend on the complexity and drying times, but you can expect it to take anywhere from 2 to 7 days.
What’s the best finish for wood furniture?
The ideal finish depends on your desired look and function. Polyurethane offers durability, wax provides a soft matte sheen, and stains enhance the natural wood grain.
Bring New Life To Old Furniture With Confidence And Creativity
Refinishing furniture is a craft that takes practice, but the results are worth it. Every piece has a story, and by refinishing furniture, you’re adding a new chapter to its history. Mistakes are part of the journey, but with patience, you’ll build skills and confidence and create unique, timeless pieces. So grab your tools, embrace the process, and enjoy the transformation that refinishing wood furniture can bring!
Level up your furniture into a statement piece with materials that tell a story. Whether you’re restoring, refinishing, or crafting something entirely new, Vintage & Specialty Wood offers an unmatched collection of reclaimed wood to spark your creativity. Discover their distinctive collection and bring your vision to life with timeless elegance.
Hire The Timber Experts For Your Next Project
Vintage & Specialty Wood should be your source of the highest quality timbers from around the world. When it comes to fabricating and installing reclaimed wood or specialty wood products in your home, we don’t cut corners. We offer many reclaimed wood and specialty wood products such as Douglas Fir, white oak, and much more. We also offer timber framing and wood flooring services as well. Contact our team today to speak to a timber expert about what Vintage & Specialty Wood can do for you.

This Blog Is Fact Checked
This content has undergone meticulous fact-checking by our team of internal experts. Gain a deeper understanding of the high editorial standards we uphold on our website here.

About The Author
Experience, exploration, and knowledge are the hallmarks of writer Rei Bayucca. Her dedication to crafting articles that both inspire and educate will leave you thinking long after you’ve finished reading.

